Exercise 3: Discovering Evidence-App Vulnerability
Estimated Time to Complete: 15 minutes
Objectives
- Interact with evidence-app using your web browser, but this time use Developer tools to see what the submission looks like
- Fuzz the application by altering the
POSTpayload sent to the application and review the results - Review the source code to see where the vulnerability lies
Challenges
Challenge 1: Interact With Evidence-App (Again)
Instead of simply uploading another file, enable Developer tools in your web browser and see what the upload payload looks like when /api/ is communicated with.
Note
There is a walkthrough for some of the more common web browsers. If you use a different web browser than what is listed, research how to enable developer tools and how to view raw requests.
Solution - Google Chrome/Brave
-
Go to the browser tab with the evidence-app homepage. Again, if you closed it, you can recover the URL by running the following in your CloudShell session:
echo $TARGETExpected Results
https://d1dw3pytnie47k.cloudfront.net -
Open Developer tools for this tab by either pressing
F12or clicking on the triple dots in the top-right of the browser (1), hovering over More tools (2), and clicking on Developer Tools (3).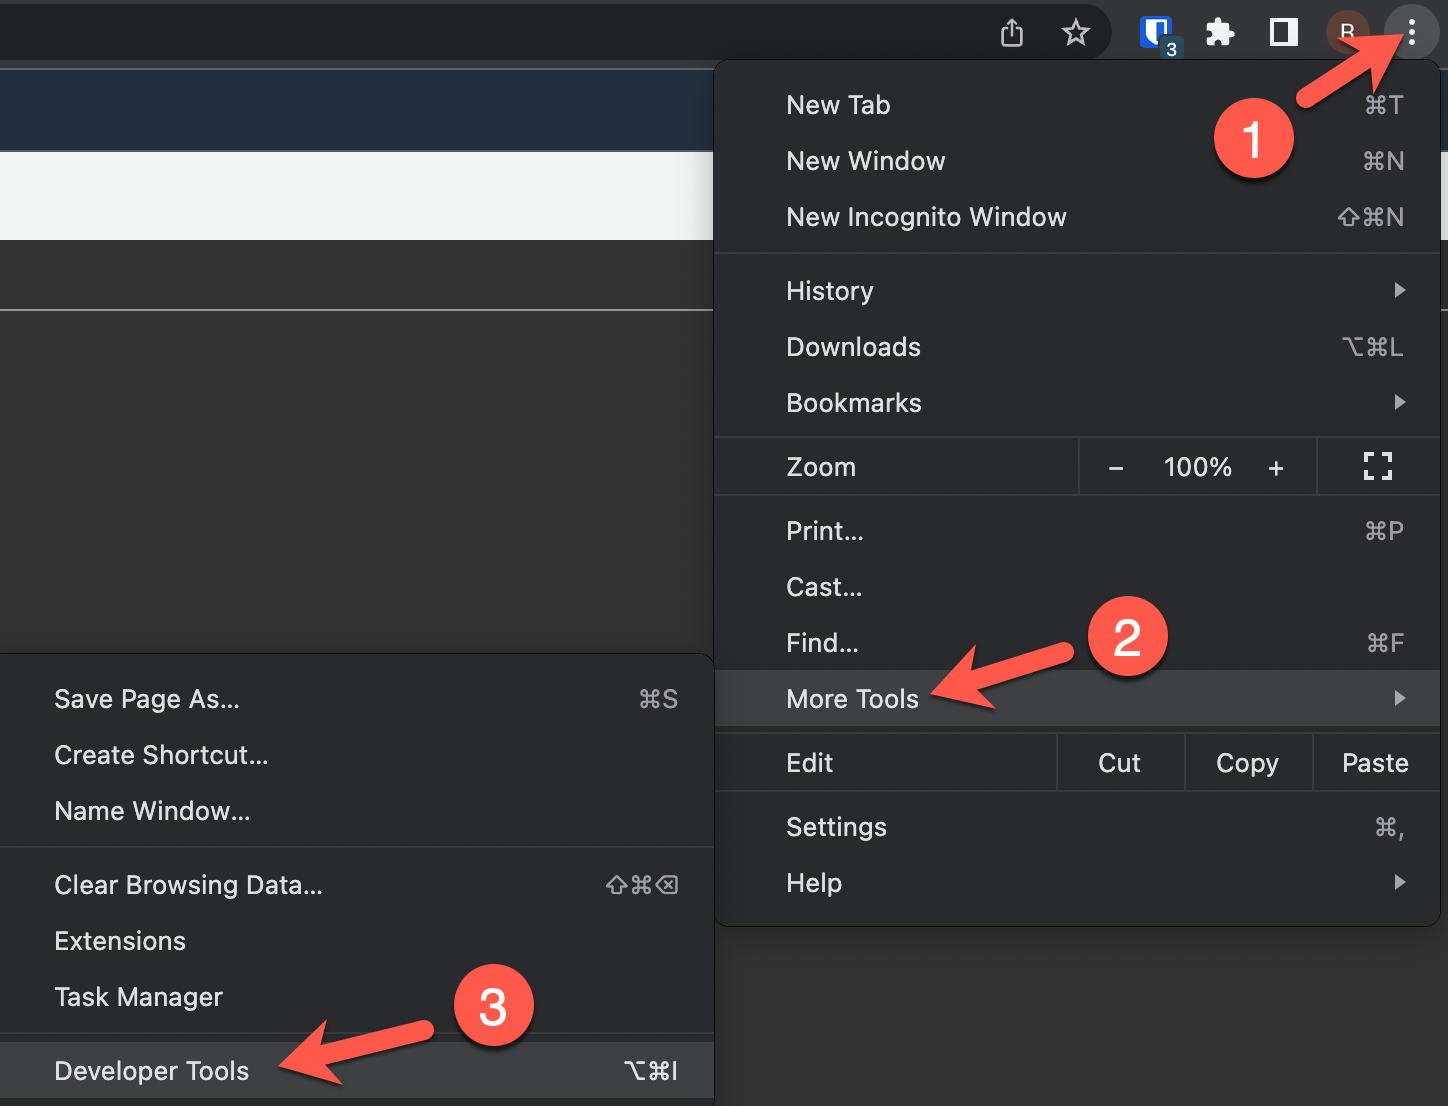
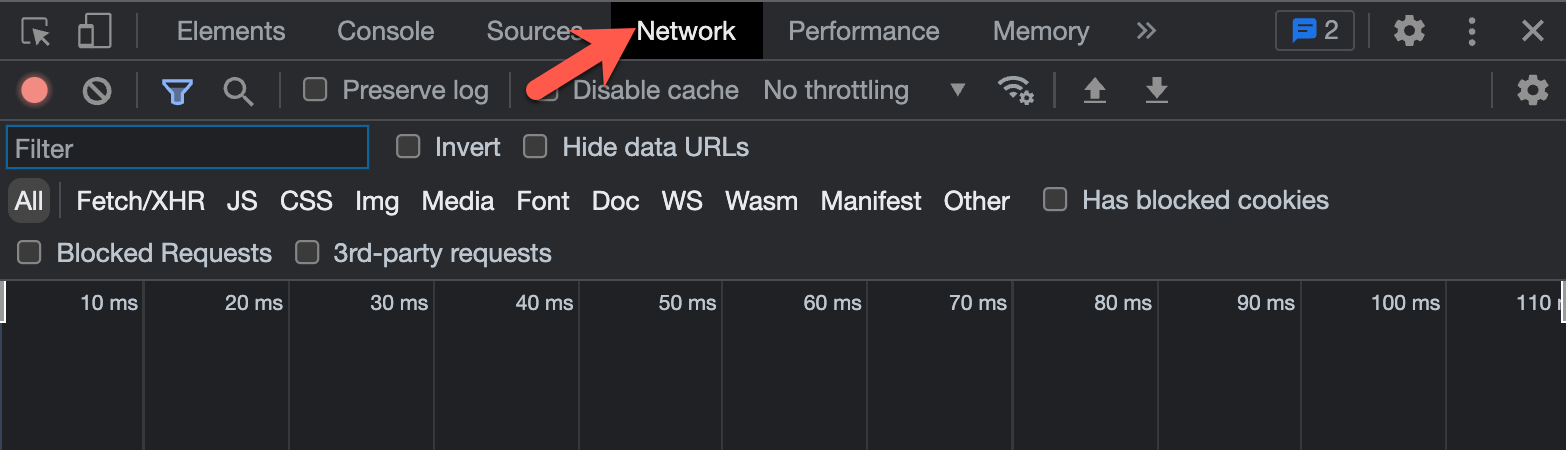
-
A new pane should open on the right. To prepare for reviewing client and server communication, click on the Network tab.
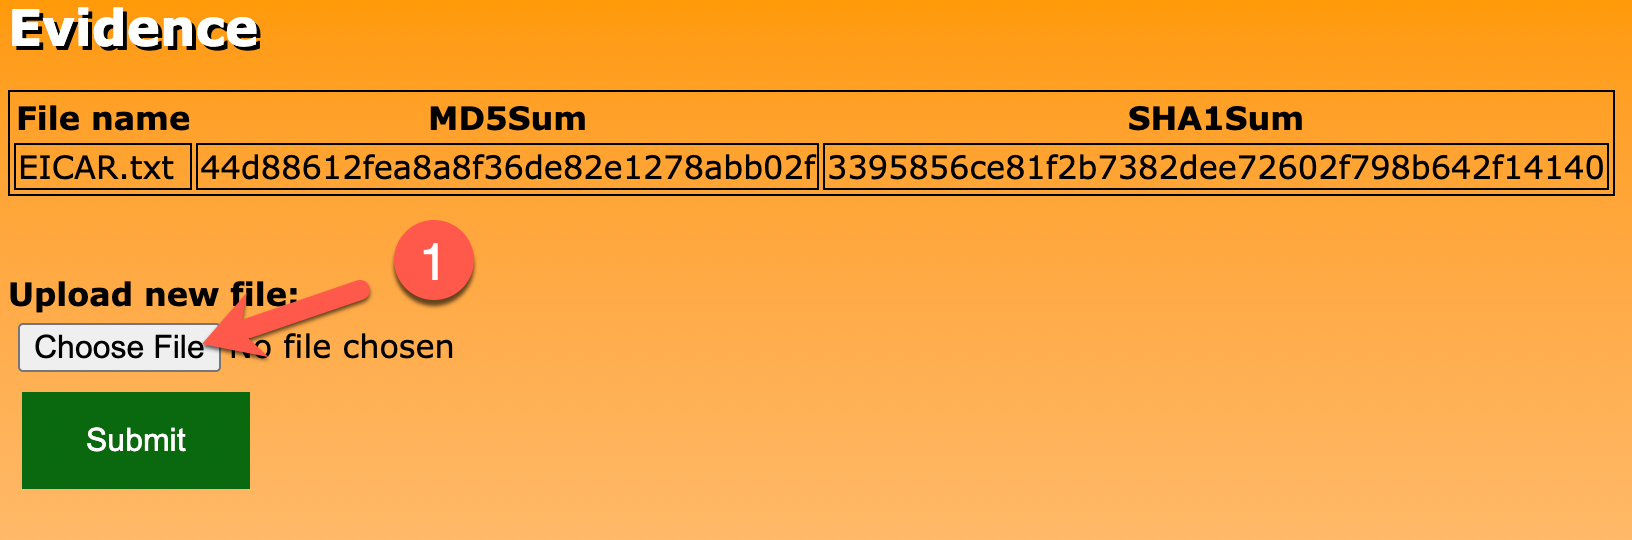
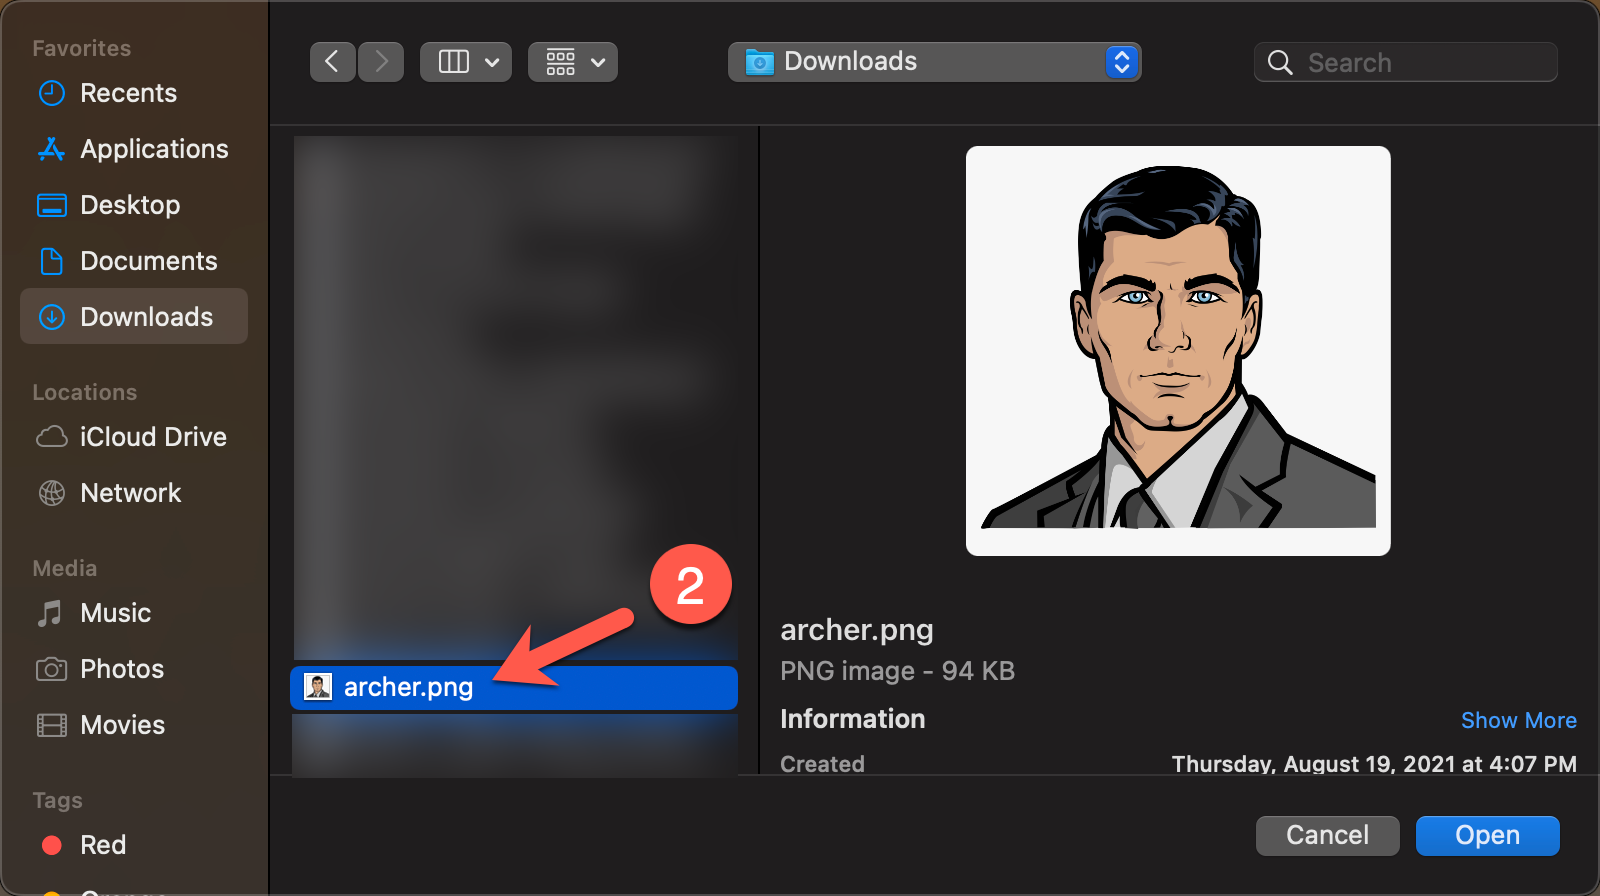
-
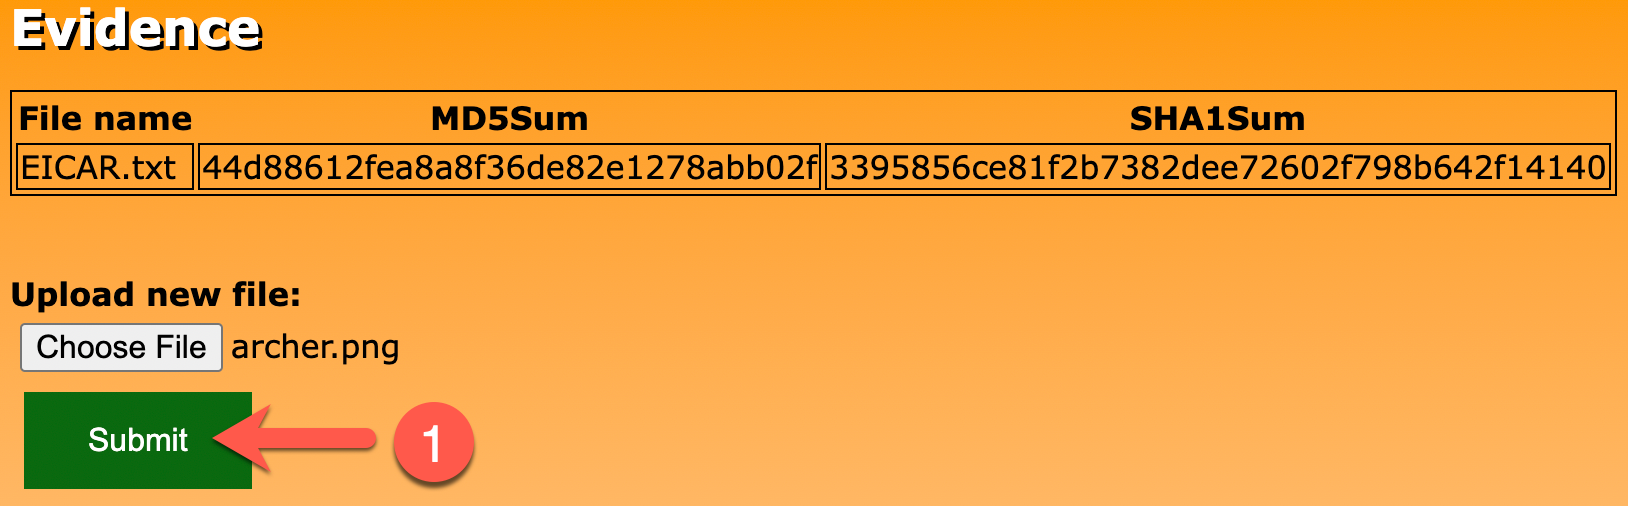
Upload another file as you did in Exercise 2, Challenge 1. Click on the Choose File button (1) and select a file of your choice (2).
-
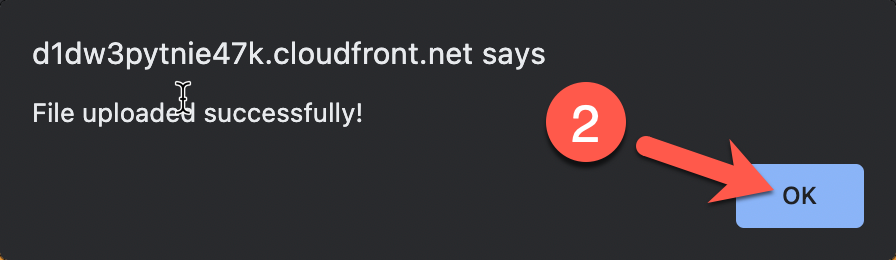
Click the Submit button (1). Click on the OK button in the alert popup (2). After a few moments, the file will be hashed and the results loaded on the page (3).

-
In the Developer Tools pane, you should see two requests to
/api/. The first is thePOSTrequest (the file upload) and the second is theGETrequest (refreshing the table on the web page). Click on the first request to/api/(1) and then, when a new pane opens, click on Payload (2).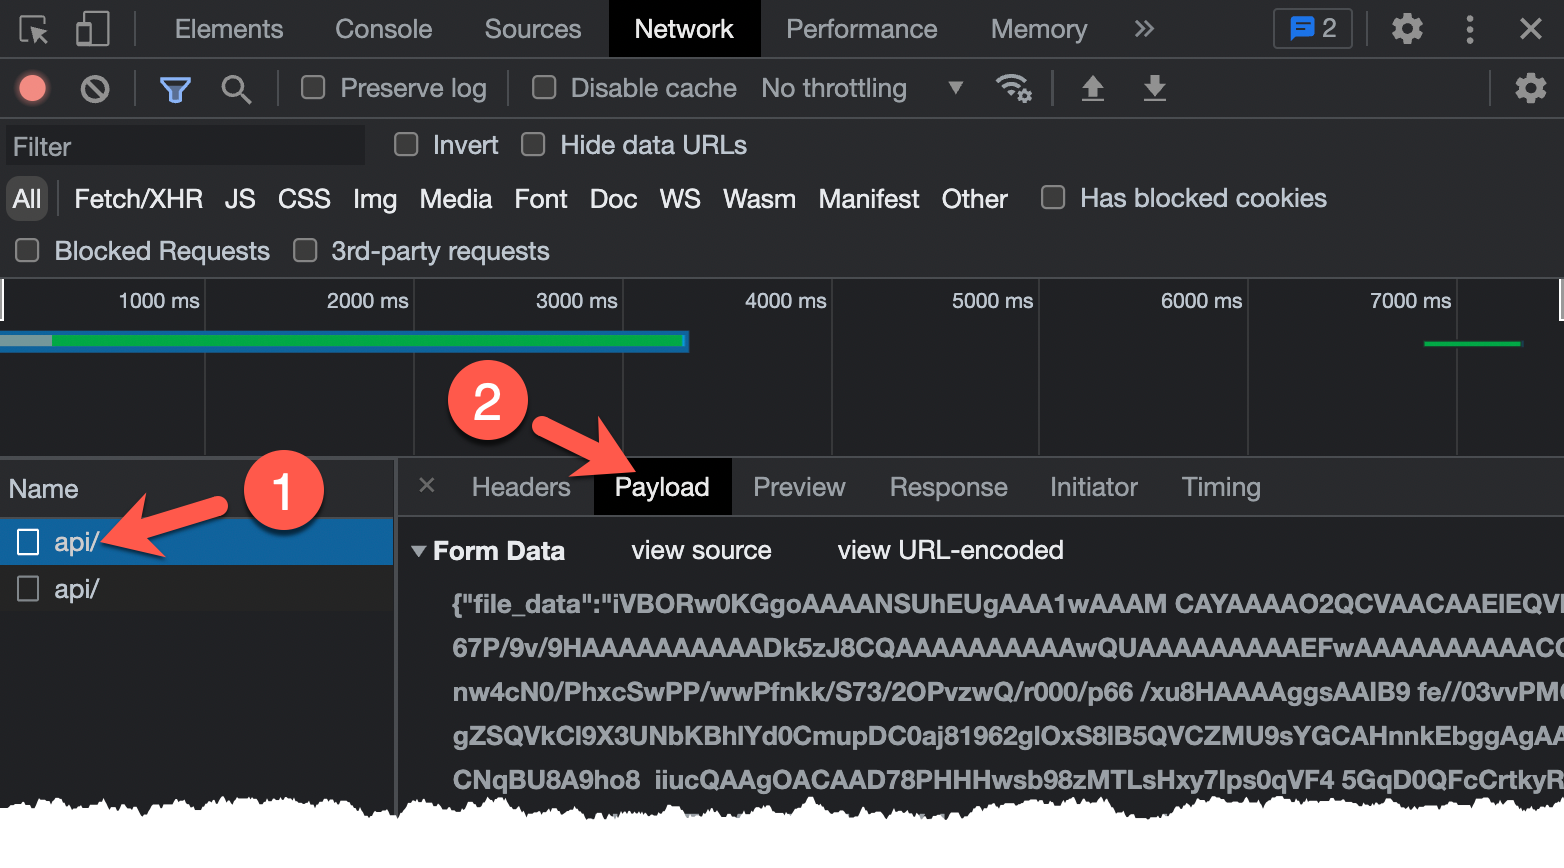
-
If you look closely at the Form Data, what is being submitted to
/api/is a JSON object with two fields:file_dataandfile_name. The first (file_data) contains base64-encoded file contents andfile_nameis the name of the file submitted.
Solution - Firefox
-
Go to the browser tab with the evidence-app homepage. Again, if you closed it, you can recover the URL by running the following in your CloudShell session:
echo $TARGETExpected Results
https://d1dw3pytnie47k.cloudfront.net -
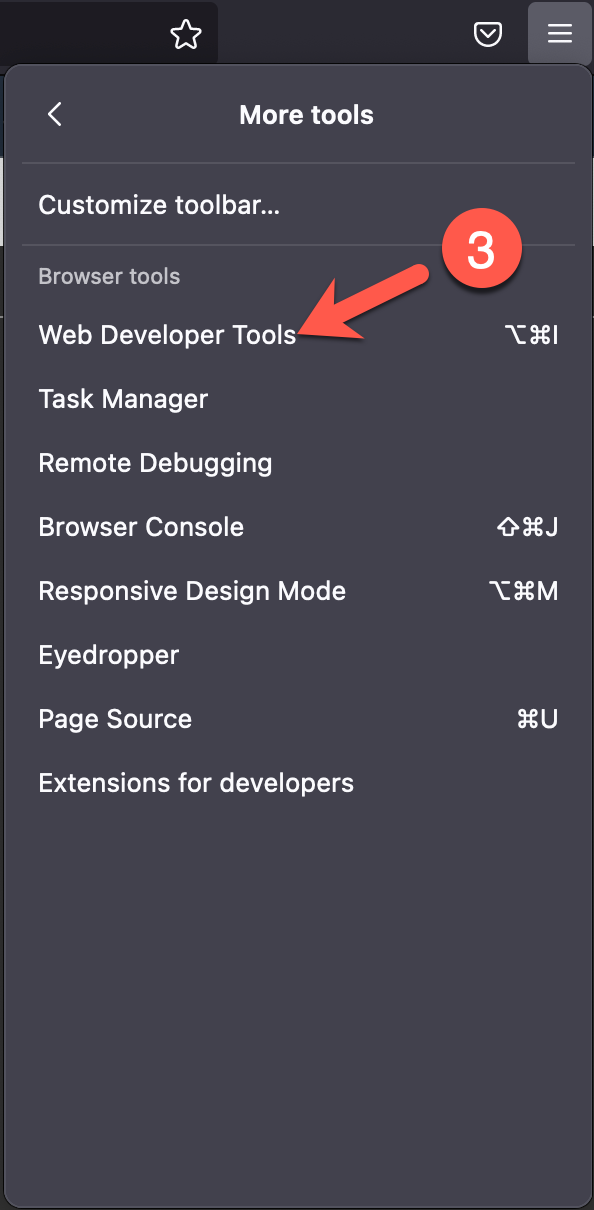
Open Web Developer Tools for this tab by either pressing
F12or clicking on the hamburger button in the top-right of the browser (1), clicking on More tools (2), and clicking on Web Developer Tools (3).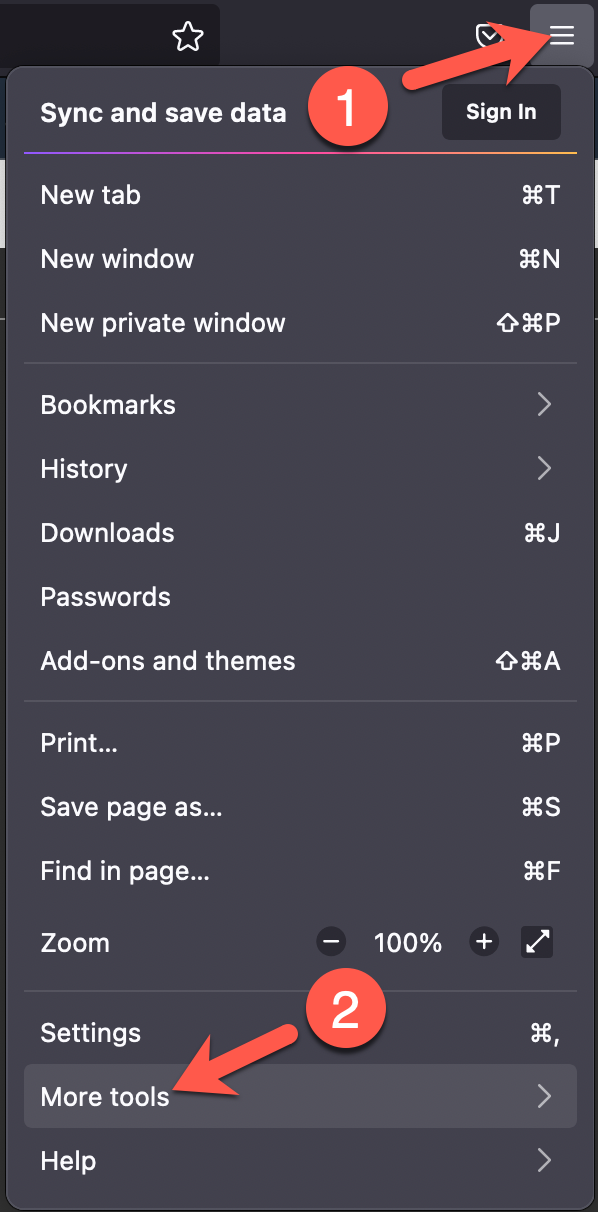
-
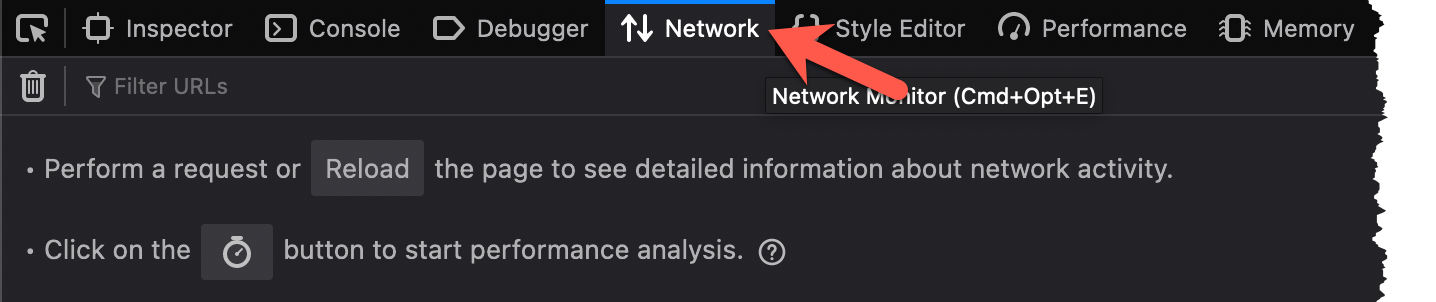
A new pane should open on the bottom of the pane. To prepare for reviewing client and server communication, click on the Network tab.
-
Upload another file as you did in Exercise 2, Challenge 1. Click on the Choose File button (1) and select a file of your choice (2).
-
Click the Submit button (1). Click on the OK button in the alert popup (2). After a few moments, the file will be hashed and the results loaded on the page (3).
-
In the Web Developer Tools pane, you should see two requests to
/api/. The first is thePOSTrequest (the file upload) and the second is theGETrequest (refreshing the table on the web page). Click on the first request to/api/(1) and then, when a new pane opens, click on the Request tab (2).
-
If you look closely at the Form Data, what is being submitted to
/api/is a JSON object with two fields:file_dataandfile_name. The first (file_data) contains base64-encoded file contents andfile_nameis the name of the file submitted.
Challenge 2: Fuzz Evidence-App
Being a web application, we would likely want to spend a decent amount of time performing attempts to uncover the OWASP Top 10 web vulnerabilities. We do not have that kind of time in this workshop so we will focus on one in particular: Injection. Using the POST data that was discovered when interacting with the application, see if you can fuzz either one of the POST variables and see if the application responds unexpectedly.
Solution
-
As you are uploading data (file contents and file name) via the evidence-app, it is processed somewhere along the line and a hash of the data is generated, stored somewhere, and presented to the user via the web page. You are going to try to hijack the hashing process.
-
To hijack this process, you will try to manipulate the data that is
POSTed to the application. You have two choices, thefile_namevalue or thefile_datavalue. Let's start withfile_name. -
You can fuzz an application with many different types of values, but, in the interest of time, let's see if we can fuzz the application with some command injection attempts. If you look here you will find a nice list of command injection payloads that you can set as the
file_namevalue. This would take quite a while to do manually, so, like many useful techniques, there's a script for that located at/home/cloudshell-user/scripts/fuzz_evidence_app.py./home/cloudshell-user/evidence-app/scripts/fuzz_evidence_app.pyExpected Results
usage: fuzz_evidence_app.py [-h] --target CLOUDFRONT_URL fuzz_evidence_app.py: error: the following arguments are required: --target -
Notice that the
fuzz_evidence_app.pyrequires a single parameter:--target. Since you are going to be fuzzing the/api/endpoint of the CloudFront distribution, set the--targetflag to$TARGET/api/./home/cloudshell-user/evidence-app/scripts/fuzz_evidence_app.py --target $TARGET/api/Expected Results
;id; worked as command injection for the file_name parameter! Here is a curl command: curl -X POST https://d3d7nz3kb2bgwk.cloudfront.net/api/ -H 'Content-Type: application/x-www-form-urlencoded; charset=UTF-8' -d '{"file_name":";id;","file_data":"dGVzdAo="}' -
The script is telling you that command inject worked! But how was it able to tell this? Simple:
- Loop through some common command injection payloads which are set to the
file_nameparameter's value. - Set the
file_datatodGVzdAo=. - Check the result.
- If no result, there was probably a server-side error we cannot see.
- If there is a result, but the
MD5orSHA1hashes returned match what is expected when submitting this file'sfile_data, command injection did not work. - If something else is returned, we caused the application to behave in an unexpected manner.
- Loop through some common command injection payloads which are set to the
-
Take a look at the evidence-app's homepage again by switching back to the browser tab and clicking the Refresh button.
-
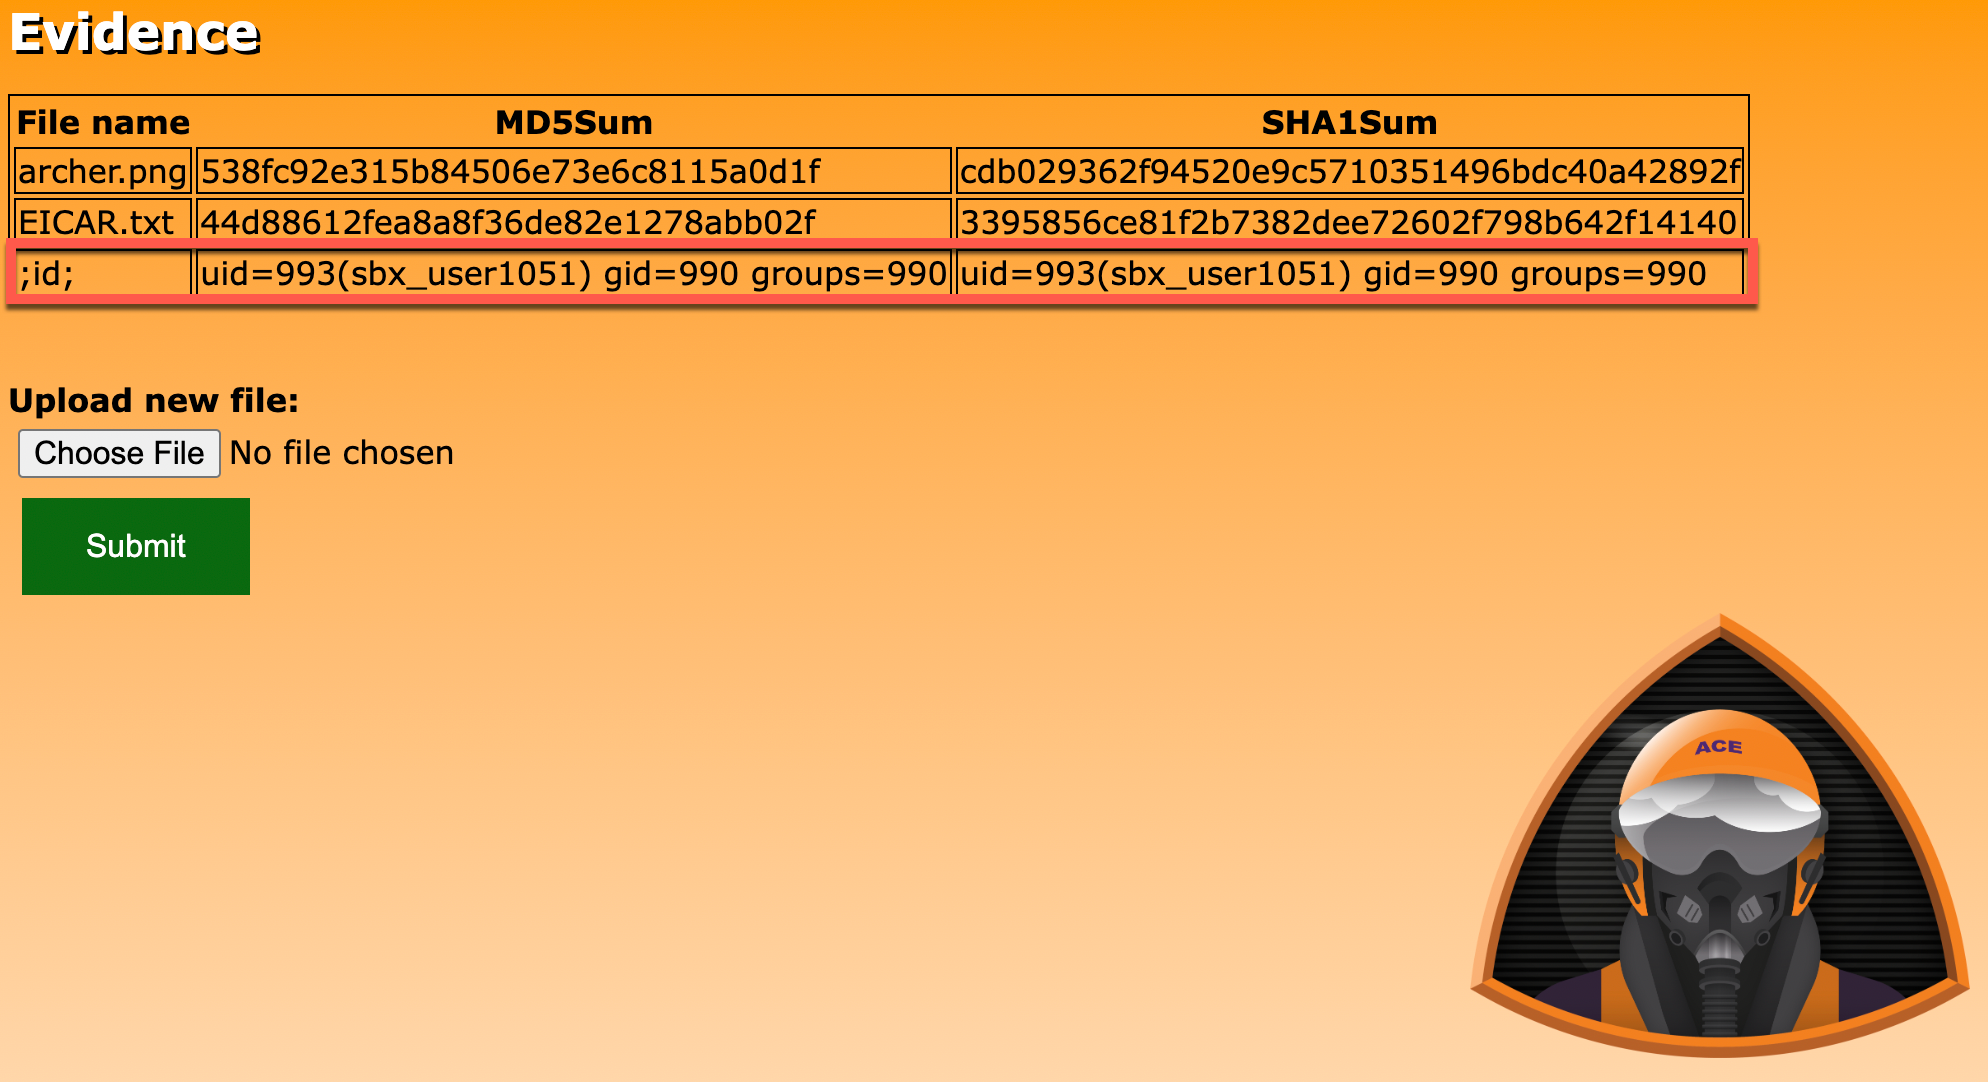
Notice something odd? We see under the File Name column the command injection value (
;id;) and, instead of MD5 and SHA1 hash values, we see the output of theidcommand! -
The
idcommand returns information about the user on the server-side system that executed that command. So who issbx_user1051(your username may vary)? That is a well-known username format used in AWS Lambda Functions. Looks like we hijacked a function!
Challenge 3: Source Code Review
How was it possible that you could run system commands by submitting a simple POST request? There was a command injection flaw in the code. The function code is available to you in the /home/cloudshell-user/evidence-app/evidence.py.tpl file. Can you find the line(s) which need to be addressed to prevent this type of exploitation?
Solution
-
The source code for your Lambda function is included in the CloudFormation template (
cloudformation.yaml) that was deployed in the first exercise bycloudformation-deploy.sh. Review the source code by running the following command in your CloudShell session:grep ZipFile -A85 cloudformation.yaml | tail -85Expected Result
""" evidence AWS Lambda function code """ import json import base64 import os import boto3 def get_evidence(): """ When GET request is made to function, return all entries in evidence DynamoDB table. """ client = boto3.client('dynamodb') results = client.scan(TableName="evidence") return { 'statusCode': 200, 'body': str(results) } def post_evidence(event: dict): """ When POST request is made to function, upload data to S3 and write hash values to evidence DynamoDB table. """ req_body = json.loads(base64.b64decode(event["body"])) # Write file to S3 client = boto3.client('s3') client.put_object( Body = base64.b64decode(req_body["file_data"]), Bucket = "${EVIDENCEBUCKET}", Key = req_body["file_name"] ) # Determine hashes filename = "/tmp/" + req_body["file_name"] temp_file = open(filename, "wb") temp_file.write(base64.b64decode(req_body["file_data"])) temp_file.close() md5_sum = os.popen("md5sum " + filename).read().split(" ")[0] sha1_sum = os.popen("sha1sum " + filename).read().split(" ")[0] # Write results to database client = boto3.client('dynamodb') client.put_item( TableName='evidence', Item={ 'FileName': { 'S': req_body["file_name"] }, 'MD5Sum': { 'S': md5_sum }, 'SHA1Sum': { 'S': sha1_sum } } ) return { 'statusCode': 200, 'body': "Success" } # pylint: disable=unused-argument def lambda_handler (event, context): """ Entrypoint for AWS Lambda Function - evidence """ request_method = event['requestContext']['httpMethod'] if request_method == "GET": response = get_evidence() elif request_method == "POST": response = post_evidence(event) else: response = { 'statusCode': 403, 'body': "Unauthorized HTTP Method: " + request_method } return response -
It is important to know that, when you are writing Lambda functions, there is going to be a main function that is executed when the function is triggered. A common name for this initial function is
lambda_handler. That is what is being used in this application (but could have been anything - you would need to look at the Lambda resource configuration to acquire the handler function name). -
If you look at the last method (
def lambda_handler (event, context)), that is the entrypoint to the function that, when triggered, execution begins. -
When this function is triggered (in this case, by an API Gateway),
eventinformation is passed. This information would include such things as what the HTTP method was when communicating with the API Gateway and also what the payload was if any was sent. This is all included in theeventvariable. -
At the beginning of the method's code, you can see references to this
eventvariable: determining what the HTTP method was (request_method = event['requestContext']['httpMethod']) and, based upon if it were aGETorPOST, triggering another method. In our case, since we were submittingPOSTrequests to the application to execute our attacker-controlled commands, let's take a look at thepost_evidencemethod. -
If you scroll up a bit and read through the lines following
def post_evidence(event: dict):, you will find where the security hole is:md5_sum = os.popen("md5sum " + filename).read().split(" ")[0] sha1_sum = os.popen("sha1sum " + filename).read().split(" ")[0] -
At a high level, what these two lines of code are doing is taking whatever is sent as the
file_nameparameter's value, inserting it into a system command, and returning the result. In our case, we were sending in;id;so the two system commands would be:md5sum ;id; sha1sum ;id; -
In
bash, you can use semicolons to terminate a command and initiate a new one. That is what is happening here. Both themd5sumandsha1sumcommands are terminated prematurely and theidcommand is being executed - returning the AWS Lambda function's user information.
ATT&CK
MITRE ATT&CK techniques performed:
| Tactic | Technique | Description |
|---|---|---|
| Initial Access | Exploit Public-Facing Application (T1190) | Used fuzz_evidence_app.py to fuzz the application |
| Execution | Command and Scripting Interpreter: Unix Shell (T1059.003) | Found remote code execution |